



Recurring bottle tipping, jamming, or scuffing usually begins at a specific handoff, not everywhere in a bottle handling line. The fastest bottle unscrambler troubleshooting method is to isolate the first repeatable event, compare it with a known-good condition, and inspect the bottle, guide setting, flow balance, and transfer geometry in that order. Do not assume a speed change is the root cause until the path and bottle condition have been checked.
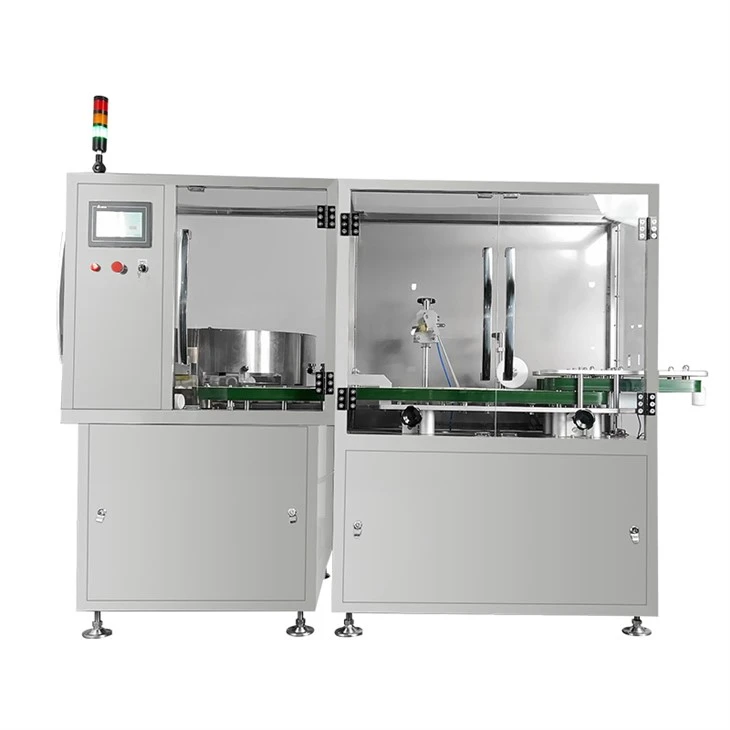
SED Pharma automatic high speed bottle unscrambler product.
Make the Line Safe and Preserve the Evidence
When bottles begin to fall, pile up, or show visible rub marks, follow the site SOP for stopping and making the line safe. Do not reach into a moving transfer area or restart repeatedly to "see if it clears." A restart can erase useful evidence and can turn a minor transfer fault into a larger accumulation event.
Before changing settings, capture the affected bottle format, time of the event, current line state, and the first location where bottle motion becomes abnormal. A short video that includes the infeed and downstream conveyor is often more useful than a close-up of the final jam. Note whether the fault begins after startup, during normal running, after a downstream stop, after an operator reloads bottles, or only after a format change.
For a validated pharmaceutical process, changes to approved settings, format parts, bottle specifications, or control logic must follow the site's SOP, risk assessment, and approved change-control or validation procedure. This article provides a fault-isolation sequence; it does not authorize changes outside those controls.
Separate the Three Symptoms Before You Adjust Anything
These symptoms often appear together, but they do not automatically have one cause. A tipped bottle can create a jam. A jam can force bottles against a rail and produce scuffing. Conversely, bottles may scuff without a jam if a guide, belt, or transfer surface is contacting the bottle continuously. Identify the first symptom in the sequence.
| Observed symptom | What it can indicate | First confirmation | Initial action |
|---|---|---|---|
| Bottle tipping | Loss of support, unstable spacing, poor transfer alignment, or a bottle that is outside the qualified format condition. | Find the first point where the bottle leans or loses base contact. | Inspect the transfer, rail relationship, bottle stability, and flow state before raising speed. |
| Bottle jamming | Excessive accumulation, a restricted guide or change part, sensor/control response, or an obstructed transfer. | Determine whether the jam starts with a single abnormal bottle or with a growing back-up. | Clear safely, inspect for foreign material or damage, then test flow at a controlled condition. |
| Bottle scuffing | A persistent contact point, abrasive contamination, unstable rubbing, or bottle-to-bottle pressure. | Mark the scuff location on the bottle and trace its likely contact path. | Inspect guides, belts, star wheels, rails, and buildup at the matching height. |
Use an Ordered Bottle Unscrambler Troubleshooting Workflow
1. Confirm the bottle is the intended, qualified format
Compare the affected bottles with an approved sample or drawing. Check material, bottle height and width, base shape, neck finish, wall stiffness, flash, deformation, label condition, and cleanliness. A bottle that looks similar may not behave like the qualified format. Static behavior, surface texture, molding variation, and storage conditions can also change how a bottle separates or slides.
Run a small, controlled comparison with a known-good bottle only when the line can be operated safely and the test is permitted by the site procedure. If the fault follows the suspect bottle rather than the machine setting, quarantine the question as a container-condition or incoming-material-quality investigation instead of continuing to adjust the equipment.
2. Locate the first abnormal transfer
Trace the bottle from bulk feed through orientation, discharge, and the next machine. Look for the first place where spacing compresses, a bottle oscillates, the base loses support, or two bottles try to occupy the same controlled space. The final pile-up is commonly downstream of the initiating point.
At a transfer, assess height, lateral alignment, rail continuity, conveyor condition, and the gap between moving surfaces. A bottle should remain supported and guided through the transition. A step, gap, misaligned rail, or speed mismatch can be harmless for one bottle geometry and destabilizing for another. Actual acceptable settings depend on the equipment, bottle material and geometry, line arrangement, and validated operating conditions; do not apply a generic dimension or speed as a universal fix.
3. Check flow balance before changing the rate
Observe whether the event occurs during steady demand or when downstream equipment pauses, rejects, or recovers. A constant stream entering a temporary restriction creates bottle-to-bottle pressure. That pressure can make stable bottles tip, cause a jam at a guide, and leave rubbed surfaces on bottles that are forced past each other.
Review the line-state signals and the response of the upstream feed. A low-bottle, full-bottle, or backup signal that is missing, delayed, incorrectly positioned, or not acted on can create the same visible symptom as a mechanical restriction. Verify the sensor condition and control response according to the approved electrical and maintenance procedure. Do not bypass safety or interlock functions for diagnosis.
4. Trace scuffing from the mark, not from the machine name
A scuff pattern provides a useful clue. A circumferential rub mark suggests sustained guide or belt contact at a consistent height. A localized mark can point to a sharp edge, damaged guide, buildup, or a single transfer point. Random marks over several areas may follow bottle-to-bottle rubbing during accumulation. Compare the mark height and direction with every surface the bottle passes.
Inspect contact surfaces for residue, wear, burrs, misalignment, loose fasteners, and materials that are not appropriate for the container surface. Cleaning method and material compatibility matter: an abrasive cleaning practice may alter a guide surface, while residue can change friction. Document the finding and return the equipment to its approved clean status before testing.
Route the Fault by When It Occurs
The same visible jam has different likely causes depending on when it begins. Record the operating state first, then inspect the relevant part of the line. This prevents an operator from treating every event as a guide adjustment.
| When the fault starts | First questions to answer | Evidence to preserve |
|---|---|---|
| Immediately after startup | Are the installed format parts, guide positions, sensor status, and startup sequence the approved ones? | A short video from feed through first transfer, selected recipe or format identification, and active alarms. |
| Only during stable running | Does the fault follow bottle lot, hopper condition, contamination, static behavior, or progressive buildup at one contact point? | Bottle samples before and after handling, the first scuff location, and photos of matching contact surfaces. |
| After a downstream stop or recovery | Did upstream feed reduce in time, and did conveyor accumulation remain within the intended line-control behavior? | The event sequence, HMI alarm or state indication, and video covering the affected handoff before restart. |
| After changeover or cleaning | Were the correct parts installed, the approved settings restored, and all cleaned surfaces inspected for residue or damage? | Changeover record, part identifiers, setting verification, and post-cleaning inspection result. |
Test One Variable at a Time
Once the probable zone is known, make one controlled, approved change and observe the same fault condition. Changing guide position, feed behavior, and line rate at once may make the fault disappear temporarily without revealing which change mattered. Record the original state, changed condition, bottle format, observed result, and whether scuffing or instability returns after the line reaches its normal state.
- For a tipping event, test support and guidance through the identified handoff before increasing speed.
- For a jam, establish whether the first restriction is mechanical, a foreign object, or accumulated demand from an upstream/downstream control mismatch.
- For scuffing, test the suspected contact path with inspected, clean surfaces and confirm whether the mark location changes or stops.
- For faults after changeover, compare every installed format part and approved setting with the format record before making a new setting.
When a change affects bottle presentation, product quality, throughput, or validated status, complete the required review and approval before returning to production. A successful short test does not by itself establish a validated production setting.
Use a restart check that reflects the original fault state. If the line only fails after accumulated bottles reach a certain transfer, a short empty-line run is not sufficient evidence. Observe startup, normal running, controlled downstream backup, and recovery where those states are part of the approved operating range. Record the tested bottle format, operating state, approved setting or part change, observation period, good output, rejects, interventions, and result. The purpose is to confirm that the initiating condition has been removed, rather than simply confirming that bottles can move for a few seconds.
Prevent the Next Event With a Better Fault Record
A useful fault record makes future troubleshooting faster. Include the bottle identifier, lot or incoming condition where relevant, line state, start location, photos of the bottle and contact path, current approved settings, and corrective action. If a bottle jamming pattern appears only after a downstream machine stops, include the stop reason and the upstream response. If scuffing appears on a specific shift or after cleaning, record the cleaning status and inspection findings.
The bottle unscrambler operation method is a useful reference for basic pre-start checks and operator observation. For formats or line modifications, the bottle unscrambler URS and FAT specification guide explains how bottle condition, line interfaces, and observable acceptance criteria should be defined. The FAT protocol for pharmaceutical packaging machinery provides a directly relevant evidence-and-retest framework when a recurring bottle-handling fault requires controlled verification. For a directly relevant example of bottles entering the conveyor after controlled orientation, see the automatic PET bottle unscrambler page.
When to Request a Technical Review
Escalate the issue when the same fault returns after approved checks, when a bottle change may be involved, when the first abnormal motion cannot be identified safely, or when cosmetic damage affects the established quality criterion. For a review of the equipment family and related handling options, see the SED Pharma bottle unscrambler range and the automatic high speed bottle unscrambler product page.
SED Pharma can use the event record to review the bottle-handling boundary with your team. The aim is not to guess from a single symptom, but to identify the first repeatable abnormal condition and determine what evidence is needed before a configuration or operating change is approved.
Conclusion
Effective bottle unscrambler troubleshooting starts with the first abnormal bottle, not the final jam. Confirm the bottle condition, find the initiating transfer, separate flow imbalance from a mechanical restriction, and use the scuff pattern to trace contact. Testing one approved variable at a time produces evidence that operators, maintenance, engineering, and quality teams can use without introducing a new uncontrolled condition.
Need help isolating a repeat bottle-handling fault?
Send SED Pharma a short fault video, bottle samples or drawings, the affected format, the line-speed trend, and photos of the suspected contact points for an initial technical review. You may also return to the SED Pharma homepage to explore related pharmaceutical packaging equipment.